Roof renovation bitumen roof / flat roof
with polyurethane roof spray foam and liquid plastic PURelastik
The following example shows the individual steps of a bitumen roof renovation:
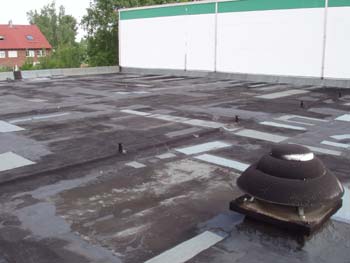
This roof of an industrial plant in Kamen (NRW) was repaired so often that almost nothing of the original waterproofing was left.
The supporting structure is a trapezoidal sheet metal roof with insulation made of polystyrene foam panels.
The waterproofing was done in several layers of bitumen sheeting.
The superstructures, here the skylight domes (northern skylight domes), were filled with bitumen compounds as part of repair work. When exposed to heat, these compounds become liquid again and tend to run off.
In addition to the extreme cracking of the entire roof surface, the roof penetrations are particularly susceptible to leaks.
The overall view of this roof system totaling approx. 10,000 m² shows how considerable the need for action is.
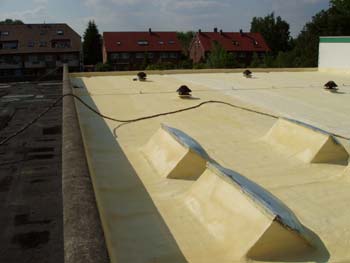
Nearly 250 skylight domes provide light in the production areas, but also cause constant problems with the waterproofing.
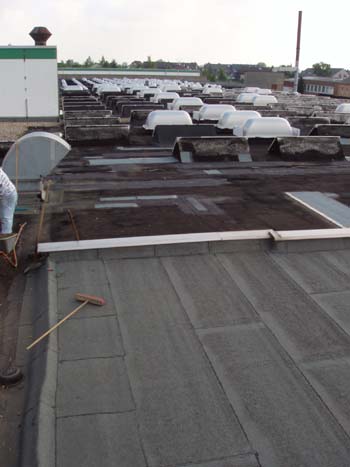
In the course of this customer's company history, the hall capacity was repeatedly expanded as needed. Today, we have different roofs on different levels, most of which were originally also waterproofed with different products.
From foil to bitumen sheeting, everything is represented that was favored by the corresponding roofing contractor at the time of manufacture.

In order to obtain a reliable seal in the long term, the roof is completely foamed in sections and coated with PURELASTIK, a liquid plastic from Isopol.
Foaming is carried out in a thickness of 35 to 50 mm, depending on requirements. The specifications of the ENEV are of course met by incorporating the existing insulation. In the process, all connections and penetrations are of course optimally integrated into the insulation layer. The first decisive advantage with this method is that the roof is thermally calmed by the insulation on the outside.
The considerable temperature fluctuations of up to 70°C from sun to rain are kept away from the substructure. The good insulation layer compensates for the temperature difference.
Despite its high mechanical load-bearing capacity, the rigid polyurethane foam is elastic enough to withstand the vibrations of the roof surface. With proper processing, there is no risk of cracks.
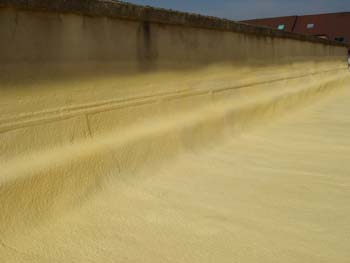
The first layer of in-situ polyurethane foam in a thickness of about 20 mm is applied. Incidentally, any number of layers can be foamed on top of each other.
In principle, the roof is already watertight. However, because the thermal insulation is to be improved at the same time as part of the refurbishment measure, an average foam thickness of around 40 mm is applied.
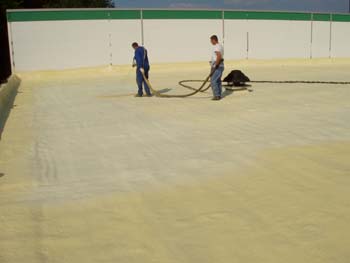
Here, the second layer of polyurethane foam is being applied. With the second layer, an average coating thickness of about 30 mm is achieved.
With the third layer of foam, the roof surface is visually leveled and the specification of 40 mm on average is achieved.
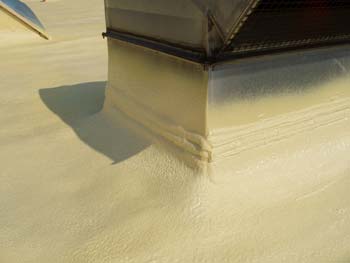
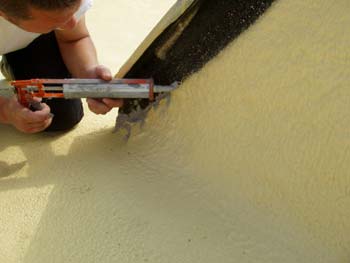
Particular attention is paid to the connections and penetrations in this process.
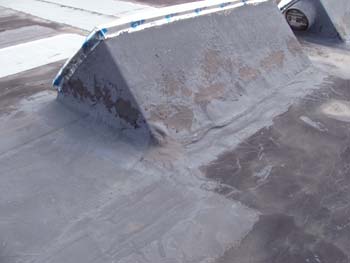
The type of sealing using groove-shaped foaming can be clearly seen on the fan assembly.
If possible, the wall flashing is extended beyond all critical points. Here, the wall connection rail, which formed the end of the bitumen board, was completely foamed over.
The rail was a weak point in that the upper edge was sealed with silicone in an unsuitable form. The silicone could be removed without effort and had lost its sealing effect.
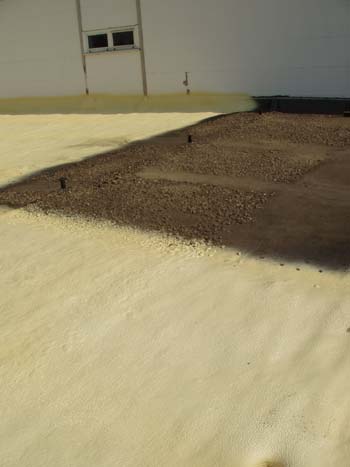
For whatever reason, gravel was applied to a section of this roof system. Over the many years, the lower layer of gravel has firmly penetrated the bitumen layer and caked with it. It is almost impossible to remove it completely.
In order to ensure permanent adhesion of the foam layer, the pressed gravel must be carefully cleaned of dirt between the pebbles.
Here, cleaning with pressurized water is always essential.
Before the coating with liquid plastic begins, all connections are checked for frictional connection with the substrate.
Wherever there is a residual risk of leakage, the connection is improved with sealant, a special and highly elastic elastomer from the tube.
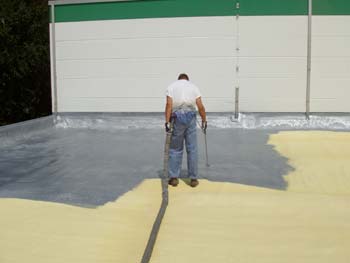
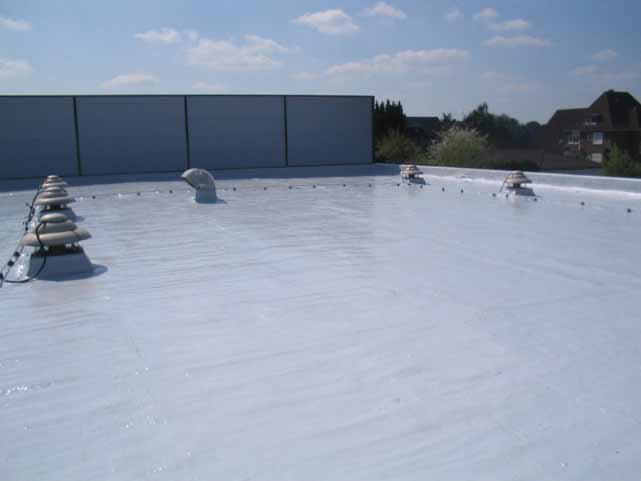
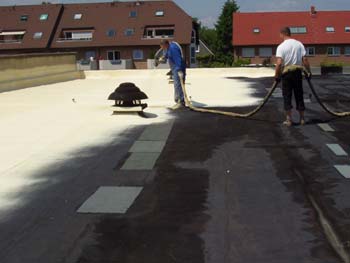
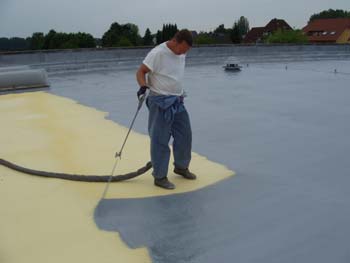
The final coating with PURELASTIK is the last step.
The final coating determines the long-term performance of the entire roof renovation.
As an alternative to the "simple" UV protective coating with PURELASTIK in 2 layers, we recommend the coating with PURELASTIK in full reinforcement as a long-term protection. This procedure has proved very successful in the renovation of neglected foam roofs. With new foam, the price - performance ratio is particularly attractive.
With PURELASTIK-UV we achieve very long maintenance intervals and thus considerable cost reductions for the client.